Showing posts with label Recipes. Show all posts

Saturday, April 20, 2024

Reviewing Bob's Top-of-the-Stove Baked Beans Recipe

Image of a serving of baked beans on a plate
The original oven baked beans of our childhoods were always SO good; cooked with lots of bacon and sweet molasses. Only problem is, they take a long time to prepare and cook. 


As our children were growing up, we did a lot of camping, and cooked on a Coleman Stove and the camp's grill. We always enjoyed having baked beans with our grilled hamburgers and hot dogs. But, without an oven, and having a time constraint out in the campgrounds, oven baked beans was not an option. Therefore, my hubby, Bob, came up with his own version of camper baked beans, which he named Bob's Top-of-the-Stove baked beans.


After our children grew up, they began to make this recipe both in camp and at home. Quite quick to prepare and always tasty, it has become a standard favorite in our family. 


Bob's Top-of-the-Stove Baked Beans Recipe


Ingredients

A selection of ingredients for a baked bean recipe

Serves 4


1 can pork & beans (we usually use Van Camp's). 

Several slices of bacon*

½ to 1 diced onion*

Mustard to taste

Ketchup to taste

1 tablespoon dill pickle juice

Brown Sugar to taste

Salt & Pepper


Instructions:


Slicing and chopping bacon and onion

  • Cut up bacon slices into one or two inch squares. Chop the onion.


Sauteing bacon and onion

  • Begin by sauteing the bacon and onion together. When done to your preference, pour off excess bacon grease (leaving a small bit for flavor).


Baked Beans recipe cooking


  • Add the can of Pork & Beans. 


  • Add all the other ingredients.


  • Simmer for 15-20 minutes to heat through and blend all the ingredients. 


  • As the beans simmer, add more ketchup and/or brown sugar to your tasting preference. This is an extremely variable recipe, so exact amounts are not given in the ingredients. Personally, I prefer lots of ketchup and enough brown sugar for that 'sweet' taste. Taste and adjust amounts to your own satisfaction as the beans simmer.


NOTE: We always used a Corning Ware pan (as shown in the accompanying pictures), so everything can be cooked in one pan. Otherwise, you might wish to saute the bacon and onion in a frying pan, then add them and the other ingredients together in a sauce pan. 


*Explanation for the *starred items in the recipe: the number of bacon strips and the amount of onion used are negotiable! Personally, we like LOTS of bacon and plenty of onion. Adjust each to your own personal preference. 


Summary


Baked Beans

Bob's Top-of-the-Stove Baked Beans Recipe is easy & quick, and definitely delicious. And it's one of those recipes that works equally as well cooked on the stove-top in your kitchen or on a camp stove at a campsite. 


It is most definitely a favorite in our family.


*All images are the personal photos of (c) Wednesday Elf


*Bob's Top-of-the-Stove Baked Beans Recipe is brought to you by Wednesday Elf


Note: The author may receive a commission from purchases made using links found in this article. “As an Amazon Associate, Ebay (EPN) and/or Esty (Awin) Affiliate, I (we) earn from qualifying purchases.”


Friday, April 5, 2024

Lemon Mini Muffin Cakes Recipe Reviewed

lemon mini muffins
A few weeks ago, my mom came to our home with a special treat for my family.  Lemon flavored anything is always my favorite.  These little mini muffin lemon cakes were fabulous!  

They were so good, I seriously could not make myself stop eating them.  I finally stuck them in the microwave so they would be "out of sight, out of mind".  However, the little mouse in me kept sneaking back for crumbs and tiny bites.

I don't have pictures of the making process because I was not with my mother when she baked them, but she did agree to let me share and review her recipe. Based on what she told me, this recipe is so easy, more pictures are not really needed.

They would be perfect for a party snack, dessert, breakfast, or perhaps all three if they can last all day in your home. Here, they only survived for one day before they were all gone. We had to guess at how many mini muffins this recipe made and decided it was approximately 48 mini muffins (2 batches when using the featured mini muffin pan below). If you should make them, please count them BEFORE you start eating or sharing them and return here to tell us how many muffins this recipe makes.


Delicious Lemon Mini Muffin Cakes & Glaze Recipe

    Mini Cakes Ingredients

  • 1 Box of Yellow Cake Mix
  • 3.4 oz box of Instant Lemon Pudding 
  • 4 Eggs
  • 3/4 Cup Vegetable Oil


    Glaze Ingredients 

  • 4 Cups sifted Powdered Sugar 
  • 1/3 Cup Lemon Juice   (Real Lemon can be used)
  • 3 Tablespoons Vegetable Oil
  • 3 Tablespoons Water
  • Grated Lemon Zest from 1 lemon, if desired


Directions

  1. Preheat the oven to 350
  2.  Spray mini muffin pan with non-stick spray
  3.  In a large bowl, combine all mini cake ingredients and mix (with mixer) for 2 minutes  
  4.  Spoon 1 Tablespoon of mix into each mini muffin cup
  5.  Bake for 12 minutes
  6.  In a medium bowl, mix together all of the glaze ingredients
  7.  Prepare a drip tray by lining a cookie tray with wax paper and place a wire rack on the tray
  8.  Turn the muffins out of the muffin pan
  9.  Dip each muffin in the glaze, covering mini muffin as much as possible
  10.  Place the dipped muffin on the prepared "drip" tray


Check Out More Recipe Reviews at
ReviewThisRecipes.com


Lemon Mini Muffin Cakes Recipe Reviewed Written by:
House of Sylvestermouse


© 2024 Cynthia Sylvestermouse


Note: The author may receive a commission from purchases made using links found in this article. “As an Amazon Associate, Ebay (EPN) and/or Esty (Awin) Affiliate, I (we) earn from qualifying purchases.”


Friday, March 8, 2024

How to Bake a Delicious Turkey Breast Reviewed

Baked Turkey Breast
I've been baking whole turkeys for many years, but I don't remember ever baking just a turkey breast until recently. 

My husband loves turkey.  I bake them a few times each year during the holidays, but even with our large family gathered for the holidays, there is still turkey meat left over.  This thrills my husband because he makes turkey sandwiches with the leftovers for a few days after I bake a whole turkey for a family dinner. 

The problem has always been that once New Year's has passed, it would normally be 11 months before a turkey would grace our dinner table again.  When our local grocery store had frozen turkey breasts on sale, I decided to bake just the breast for my husband to make our beloved sandwiches.  

What a great decision!


How to Bake a Turkey Breast

Baking a delicious turkey breast is easy!  I decided to bake the turkey breast exactly the same way I bake a whole turkey.  My mother taught me decades ago how to bake a tender turkey in a Reynold's oven bag.  

Year after year, diners praise my turkey for being tender, moist and delicious.  I have never minded sharing my secret for baking a delicious turkey and now I will share how I used the same method to bake a fabulous turkey breast.

Be sure to thaw the turkey breast in the refrigerator for 2 or 3 days before you want to cook it. Because turkey packaging tends to leak, you will want to put a tray under it and/or put it in a disposable grocery bag to keep from making a mess in the refrigerator.


supplies to bake a turkey breast

Supplies 

  • Thawed Turkey Breast 
  • Reynolds Oven Bag (Turkey Size) 
  • 1 Tbsp Flour 
  • 1/4 Cup of Butter (softened) 
  • Pepper 
  • Deep Roasting Pan

  Instructions 

Step 1:  Preheat the Oven to 350° 

Step 2:  Toss 1 Tbsp flour inside the Reynolds Oven Bag

Step 3:  Hold the mouth of the bag closed and shake the bag to cover sides & top with flour

Step 4:  Put the floured bag in a 2″ deep, heavy duty roasting pan with it opened wide to make it easy to insert the turkey breast later

Step 5:  Wash the turkey completely, inside and out and remove any ice packets inside the turkey

Step 6:  Pat dry the outside of the turkey with paper towels 

Step 7:  Carefully place the turkey inside the floured bag, leaving the bag open wide

Step 8:  Rub the entire outside of the turkey with *softened butter

Step 9:  Cut the remaining butter into pieces and place the pats on top and inside of the turkey breast.

Step 10:  Pepper the outside of the turkey

Step 11:  Close and secure the bag with a nylon tie that is included with the Reynolds Oven Bags

Step 12:  Cut six 1/2″ slits in the top of the bag to allow steam to escape while cooking

Step 13:  Tuck the ends of the bag inside the roasting pan

Step 14:  Place the pan in the oven. Be sure to allow plenty of room for the bag to expand during cooking without touching the sides, racks, heating elements, etc. of the oven. 

Step 15:  Bake according to chart in the Reynolds Oven bag. An 8 lb. turkey breast will take 2 1/2 - 3 hrs 


*Softened butter - You can leave the butter on the counter for an hour before you need it or you can microwave it on defrost for 15 - 20 seconds to soften it  


Process in Pictures

turkey breast preparationWashed, Dried, Buttered, Peppered, Prepared & Ready to Close Bag
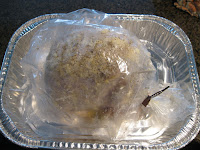
turkey breast in the bagIn the Bag, Bag Tie Secure,  & All Bag Sides Tucked Inside Pan

turkey breast in the ovenIn the Oven - Back, Sides & Top Clear


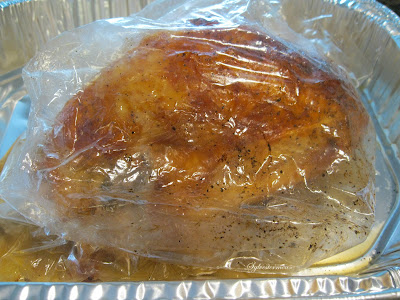
Baked Turkey Breast
Baked & Out of the Oven

At this point, you will need to let the turkey breast cool for 15 - 30 minutes.  Then, remove it from the bag, carve & serve.

According to my husband, there has never been a more delicious baked turkey breast!


My Preferred Supplies Are Available on Amazon


Check Out More Recipe Reviews at
ReviewThisRecipes.com


How to Bake a Delicious Turkey Breast Reviewed Written by:
House of Sylvestermouse


© 2024 Cynthia Sylvestermouse


Note: The author may receive a commission from purchases made using links found in this article. “As an Amazon Associate, Ebay (EPN) and/or Esty (Awin) Affiliate, I (we) earn from qualifying purchases.”


Thursday, March 7, 2024

Savory Spinach Ball Appetizers

 If you looking for an easy and healthy appetizer to serve at your next gathering, look no further than these easy spinach ball appetizers. These bite-sized delights are packed with nutrients and bursting with flavor. Whether hosting a party or craving a tasty snack, these spinach balls are the perfect choice.

Savory Spinach Ball Appetizers
Spinach Ball Appetizers - Reviewed

This is one of those recipes we had packed away and had not made for some time. This past Holiday season, Fran was going through some old recipes and found our spinach ball recipe.

We both thought wow we haven't made these in a long time. So, we decided to make them and we're so glad we did. 

Spinach Ball Ingredients:

  • 2 cups( 2-10 boxes) frozen chopped spinach
  • 3 large eggs
  • 2 cups seasoned bread crumbs
  • 1/2 cup grated Parmesan Cheese
  • 1/2 teaspoon garlic powder
  • 1/2 cup melted butter
  • 1/2 teaspoon thyme
  • 1/2 teaspoon salt
  • 1/4 teaspoon black pepper
Instructions:

  1. Thaw and pat dry the spinach.
  2. In a large mixing bowl, combine all ingredients and mix well.
  3. Scoop out portions of the mixture and roll into bite-sized balls.
  4. Place them on a greased cookie sheet or lined with parchment paper.
  5. Bake at 375 degrees for 15 to 20 minutes until they are golden brown and firm to the touch.
  6. Cool for a few minutes before serving.
These spinach balls are a great way to incorporate healthy greens into your diet without sacrificing flavor. Spinach balls are a perfect appetizer for any party or just as a snack. 

If we have any leftovers we freeze them. You can take them out of the freezer and pop them in the oven to warm them up for a snack. I like them plain, but you can experiment with different dipping sauces if you like.

For more recipes on Review This click here:

ReviewThisRecipes.com


Note: The author may receive a commission from purchases made using links found in this article. “As an Amazon Associate, Ebay (EPN) and/or Esty (Awin) Affiliate, I (we) earn from qualifying purchases.”


Friday, February 23, 2024

Chicken Broccoli Casserole aka Chicken Divan Recipe Review

chicken divan recipe
My aunt shared her Chicken Divan recipe with our family over 40 years ago and I have been making it ever since. Every member of our family will eat it (except the vegans), which is pretty miraculous. It is very rare to find a recipe that everyone likes. 

The original recipe called for frozen broccoli, however a few years back, I started making it with fresh broccoli, which the members of my household prefer. However, that does take a little more preparation time. Both frozen or fresh broccoli need to be cooked before the casserole is assembled, but fresh broccoli has to be washed and cut up into bite-size pieces. I usually just break the florets off the stems while rinsing the broccoli instead of cutting it up. 

After I wash it and separate the florets from the stems, I pour melted butter on the broccoli, add a little salt and pepper, then steam it for 8 minutes.  If I use less than 4 bunches of broccoli, I would adjust the steam time to 5 or 6 minutes, then taste test the broccoli before adding it to the casserole dish. 

I boil the chicken breasts in a large pot (5qt dutch oven) of water for 1 hr.  After it cools, I remove/discard the bones and skin.  Then I shred the chicken into bite-size pieces. 

*If you use fresh broccoli, you need 1 stick of butter to melt & pour over the broccoli before steaming


Broccoli
I used 4 bunches of Broccoli Crowns in the casserole shown

Chicken Broccoli Casserole Recipe
aka Chicken Divan Recipe 


Prep Time Cook Time Ready In Yields
1 hr 30 min. 35 min. 2 hrs 6 - 8 servings

Ingredients

    chicken divan ingredients
  • 3 – 4 Chicken Breasts  (cooked – deboned -- shredded)
  • 3 or 4 Bunches of Fresh Broccoli OR 20 oz. Frozen Chopped Broccoli (2 Boxes)
  • 2 Cans Cream of Chicken Soup
  • 2 Cups Shredded Cheddar Cheese (we prefer the Sargento brand)
  • 1 teaspoon Lemon Juice
  • ½ cup Mayonnaise

  • Directions 

    • Cook Chicken Breasts  (see boiling chicken directions above)
    • Steam Broccoli  (see steaming directions and time above)
    • Line the bottom of the casserole dish with steamed broccoli 
    • Cover the broccoli with cooked & shredded chicken 
    • In a separate bowl, Mix chicken soup, mayonnaise, lemon juice & 1 ½ cups shredded cheddar cheese together 
    • Spread the soup/mayonnaise/cheese mixture over the chicken 
    • Cover with remaining ½ cup of shredded cheddar cheese 


    chicken divan in layers
    You won't be able to see the chicken and broccoli once the soup mixture is spread across the entire top of casserole,
    but I wanted you to see how densely packed each layer should be.

    Chicken Divan Ready to Bake
    Ready to Bake


    Bake on 350° (325 convection oven) for 35 minutes


    Chicken Divan Baked & Ready to Serve
    Baked and Ready to Serve


    Check Out More Recipe Reviews at
    ReviewThisRecipes.com


    Chicken Broccoli Casserole aka Chicken Divan Recipe Review Written by:
    House of Sylvestermouse


    © 2024 Cynthia Sylvestermouse


Note: The author may receive a commission from purchases made using links found in this article. “As an Amazon Associate, Ebay (EPN) and/or Esty (Awin) Affiliate, I (we) earn from qualifying purchases.”


Tuesday, January 30, 2024

Batter Deep Fried Mushrooms

 Mushrooms, people either love them or hate them. I happen to be someone who loves mushrooms. Mushrooms are one of the foods I love, no matter how they are prepared. I even love them raw and dipped in ranch dressing. 

Batter Deep Fried Mushrooms

Today, I'm reviewing how I made our deep-fried mushrooms. These are a perfect side to any meal or delicious as a snack anytime.

Ingredients for Batter Deep Fried Mushrooms:

12 ounces of fresh white mushrooms ( I used medium size mushrooms)
1 cup all-purpose flour
1/2 cup cornstarch
1 teaspoon baking powder
1/2 teaspoon salt
1 cup of water
2 cups seasoned breadcrumbs ( I used Panko)

Instructions:
  1. Rinse the mushrooms in cold water and pat dry.
  2. Mix, flour cornstarch, baking powder, and salt in a medium size bowl.
  3. Add the cup of water, and whisk together until you have a smooth batter.
  4. Dip the mushrooms into the batter and let the excess drip off. You can use toothpicks or a fork.
  5. Roll the mushrooms in the breadcrumbs until they are coated.
  6. Deep fry until golden brown.
  7. Place them on a plate lined with a paper towel.

Fried mushrooms

After dipping the mushrooms in the batter, I rolled them in the breadcrumbs.

Battered deep fried mushrooms

I coated several mushrooms at a time before placing them in the oil.

Deep fried mushrooms

I don't have a deep fryer, so I used my 10-inch cast iron skillet. I filled the skillet a little over halfway with vegetable oil, and set the burner to medium heat. The oil needs to be between 325 to 375 degrees for frying. 

I used my ThermoPro TP-18 instant-read thermometer to make sure I had the right temperature. I fried 6 or 7 mushrooms at a time until they were golden brown. I removed them with a slotted spoon and placed them on a plate lined with paper towels.

Using a deep fryer would be much easier for sure. Read my friend Cynthia's review here: of The Presto GranPappy Electric Deep Fryer. This would be the perfect kitchen tool for deep frying these mushrooms.

You can serve your mushrooms with cocktail sauce, or ranch dressing, or eat them plain. 

If you like mushrooms here are some more of my favorite recipes:

Baked Stuffed Portobello Mushroom CapsBaked Stuffed Portobello Mushroom CapsGrilled Stacked VeggiesGrilled Stacked VeggiesItalian Sausage Stuffed MushroomsItalian Sausage Stuffed Mushrooms


For more recipes on ReviewThis Click Below:


Note: The author may receive a commission from purchases made using links found in this article. “As an Amazon Associate, Ebay (EPN) and/or Esty (Awin) Affiliate, I (we) earn from qualifying purchases.”


Thursday, January 4, 2024

Crispy Air Fryer Tater Tots

 Air fryer tater tots are quick and easy snacks or the perfect side to any meal. These tater tots come out of the air fryer so crispy on the outside and soft and tender on the inside.

Crispy Air Fryer Tater Tots
Crispy Air Fryer Tater Tots - Reviewed

Tater tots are just one of those foods that are loved by kids and adults alike. Our grandson Tyler loves his tater tots made in the air fryer. It is so easy to make tater tots in the air fryer from frozen to the table in about 10 to 15 minutes.

How to make tater tots in the air fryer:

The air fryer is the quickest way to make the crispiest tater tots right from the freezer.

  1. First, set your air fryer to air crisp and the temperature to 400 degrees. The high temperature is important for crispy tater tots. Set the timer for 12 minutes.
  2. I place the frozen tater tots in a one-gallon plastic storage bag. Add one tablespoon of olive oil and toss them around. You can also use a cooking spray if you like.
  3. Place the frozen tater tots in the air fryer basket and lightly season with salt. Cook for 6 minutes then open and toss them around in the basket. This is important so they don't stick together. Cook for the remaining 6 minutes. 
  4. Place them in a bowl and serve plain or with your favorite dipping sauce.
We like to have some different dipping sauces, such as ketchup, ranch, or barbecue sauce. My favorite is the barbecue sauce but when our granddaughters are visiting, the ranch is their favorite.

More seasoning suggestions for tater tots:

  • Smoked Paprika
  • Italian Seasoning
  • Taco Seasoning
  • Montreal Steak Seasoning
  • Old Bay Seasoning
These are just some ideas for different seasonings. You can season your tater tots with whatever you like. The amounts depend on your taste but usually, one tablespoon per basket in the air fryer is enough.

We use our Ninja Foodi Grill to air fry. The Ninja is a combination indoor grill and air fryer. We have had our Ninja for several years and just love it. Any air fryer will work just as well.

For more recipe ideas on ReviewThis Click Below:

ReviewThisRecipes.com


Note: The author may receive a commission from purchases made using links found in this article. “As an Amazon Associate, Ebay (EPN) and/or Esty (Awin) Affiliate, I (we) earn from qualifying purchases.”


Most Recent Reviews on Review This Reviews


Search for Reviews by Subject, Author or Title

The Review This Reviews Contributors


SylvestermouseSylvestermouseDawn Rae BDawn Rae BMbgPhotoMbgPhotoBrite-IdeasBrite-IdeasWednesday ElfWednesday ElfOlivia MorrisOlivia MorrisTreasures by BrendaTreasures by BrendaThe Savvy AgeThe Savvy AgeMargaret SchindelMargaret SchindelRaintree AnnieRaintree AnnieLou16Lou16Sam MonacoSam MonacoTracey BoyerTracey BoyerRenaissance WomanRenaissance WomanBarbRadBarbRadBev OwensBev OwensBuckHawkBuckHawkDecorating for EventsDecorating for EventsHeather426Heather426Coletta TeskeColetta TeskeMissMerFaeryMissMerFaeryMickie_GMickie_G


Review This Reviews is Dedicated to the Memory of Our Beloved Friend and Fellow Contributor

Susan DeppnerSusan Deppner

We may be apart, but
You Are Not Forgotten


“As an Amazon Associate, Ebay (EPN) and or Etsy (Awin) Affiliate, I (we) earn from purchases.” Disclosure Statement

X